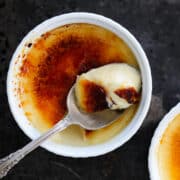
Vanilla Bean Crème Brûlée
This is the best Vanilla Bean Crème Brûlée recipe brought to you from the kitchen of a professional pastry chef. The custard is light and creamy and it has that satisfying crack from the caramel top!
Servings: 6 people
Ingredients
- 460 g Heavy Cream
- 86 g Sugar divided
- ¼ teaspoon Kosher salt
- ½ Vanilla Bean scraped
- 1 Whole Egg large
- 20 g Egg Yolk large
- 1 teaspoon Vanilla Extract
- ¼ cup Granulated sugar (for topping) will be the part that you brûlée
Instructions
- Preheat the oven to 325°F.
- In a sauce pot combine cream, half of the sugar (this is the sugar not set aside for the topping), salt, and vanilla bean. Bring just to a boil.
- When this comes close to boiling whisk together vigorously the egg and egg yolk then whisk in the remainder of the sugar (this is the sugar not set aside for the topping) until it lightens slightly. This technique is called blanchir for my fellow cooking and Francophile nerds out there!
- When the cream comes just to a boil, slowly add a little hot cream to the eggs, whisking constantly. Continue adding slowly until all the cream has been added. This is called tempering. If you accidentally add a bit too much hot cream or add it a little too fast and you get those coagulated (cooked!) bits of egg, then just strain it through a fine mesh sieve or chinoise before adding to your ramekins. Skim off the foam.
- Add the vanilla extract.
- Divide between ramekins and set them in a large deep dish or roasting pan. To get the last little bubble off the surface, pass a kitchen torch over the top. This will pop them instantly.
- Cover the top of the entire larger dish with foil, then pull back a corner so you can see.
- Transfer to the middle rack in preheated oven. Carefully pour hot water into the dish just to come halfway up the outsides of the ramekins. Replace the foil over the corner and close the oven.
- Bake for about 20-30 minutes until the centers jiggle like jello and are no longer liquid. You can place a small spoon on the surface and it will hold the weight, though I prefer to rely on the jiggle test. The bake time will vary VASTLY by the actual heat of your oven and the size / shape of the ramekin you chose. A larger flat ramekin will bake much faster. Just keep checking. If you are a nervous nelly or you know your oven runs hot, you can bake them at 300°F. I initially did but then I turned it up because it was taking over 40 minutes and they still weren’t set!
- Remove ramekins carefully using some combination of kitchen tongs, a spatula and a towel.
- Allow to cool to room temperature and then cover with plastic wrap and refrigerate for at least 2 hours but ideally overnight. The colder they are, the longer you will have to torch the top and get a nice thick crust!
- When you are ready to serve, place about half a tablespoon of sugar on the top (again this will depend on the surface area of the ramekin you choose) and then tilt the ramekin to coat the top evenly. You want a coating that is thick enough to see the sugar but not so thick that you can’t see any of the custard.
- Starting a little further away or with a lower flame begin melting the sugar with a kitchen torch. Gradually increase the speed and torch until a nice dark caramel is formed on the surface. Allow to set. This only takes about 3 minutes. Serve immediately!
Video
Notes
Presentation - Use any shape of ramekin that your heart desires. For the best presentation, you will want to do your brûlée right before you serve it!
Flavor Tips - Don’t boil your vanilla extract, it dampens the flavor.
Technique - Cover your roasting pan with aluminum foil (and make a peephole for yourself) so you can keep track of the water as you pour it in. You can tell that your Crème Brûlées are done when they jiggle a little bit but look cohesive.
Variations - Once you have the main custard down, you can make variations inspired by other custard-style pies! Think key lime Crème Brûlée, coffee Crème Brûlée, Pumpkin Pie Crème Brûlée, Banana Crème Brûlée, and on and on.
Storage - Store Crème Brûlée at room temperature refrigerated for 1 week. Wrap the cooled Crème Brûlée in plastic wrap before storing.
Yield: 6, 3 oz ramekins
Nutrition
Calories: 371kcal | Carbohydrates: 25g | Protein: 4g | Fat: 29g | Saturated Fat: 18g | Polyunsaturated Fat: 1g | Monounsaturated Fat: 8g | Trans Fat: 1g | Cholesterol: 150mg | Sodium: 130mg | Potassium: 88mg | Sugar: 25g | Vitamin A: 1215IU | Vitamin C: 1mg | Calcium: 59mg | Iron: 1mg