This post may contain affiliate links. Please read our disclosure policy.
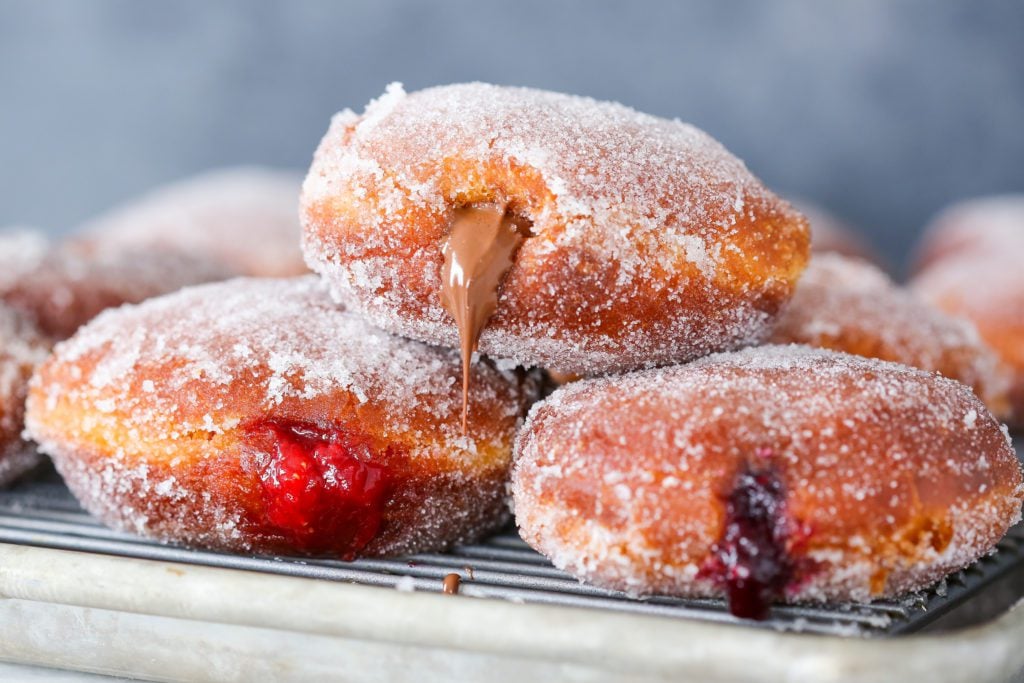
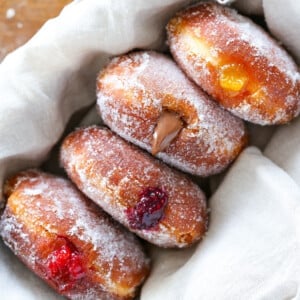
These Jelly Donuts are a soft, tender yeasted doughnut that is rolled in sugar and then stuffed with a variety of jams, jellies and Nutella!

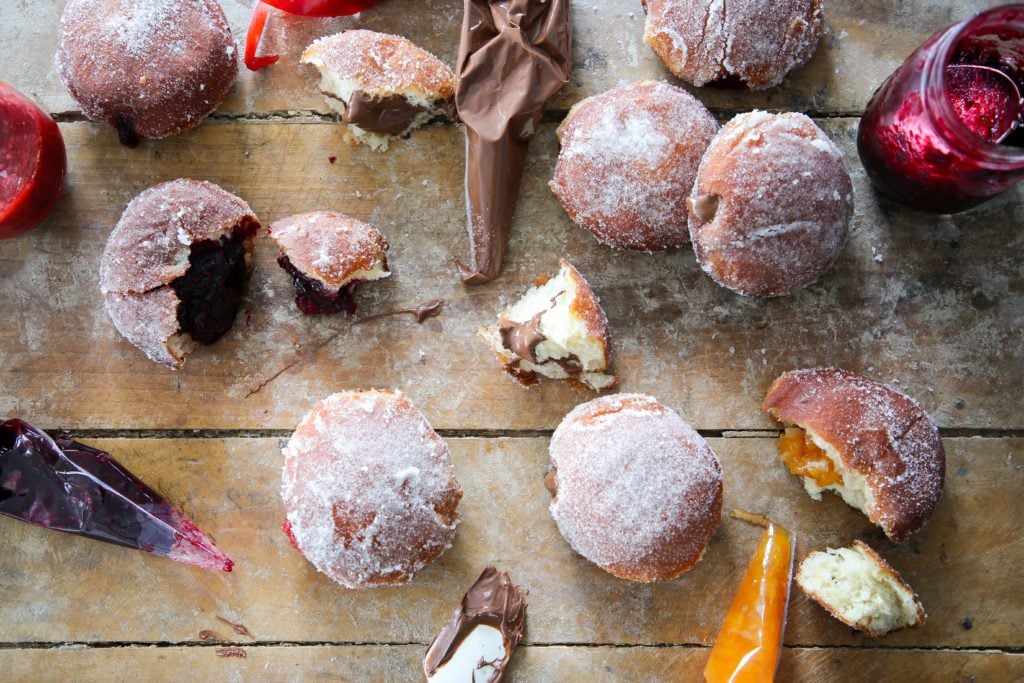
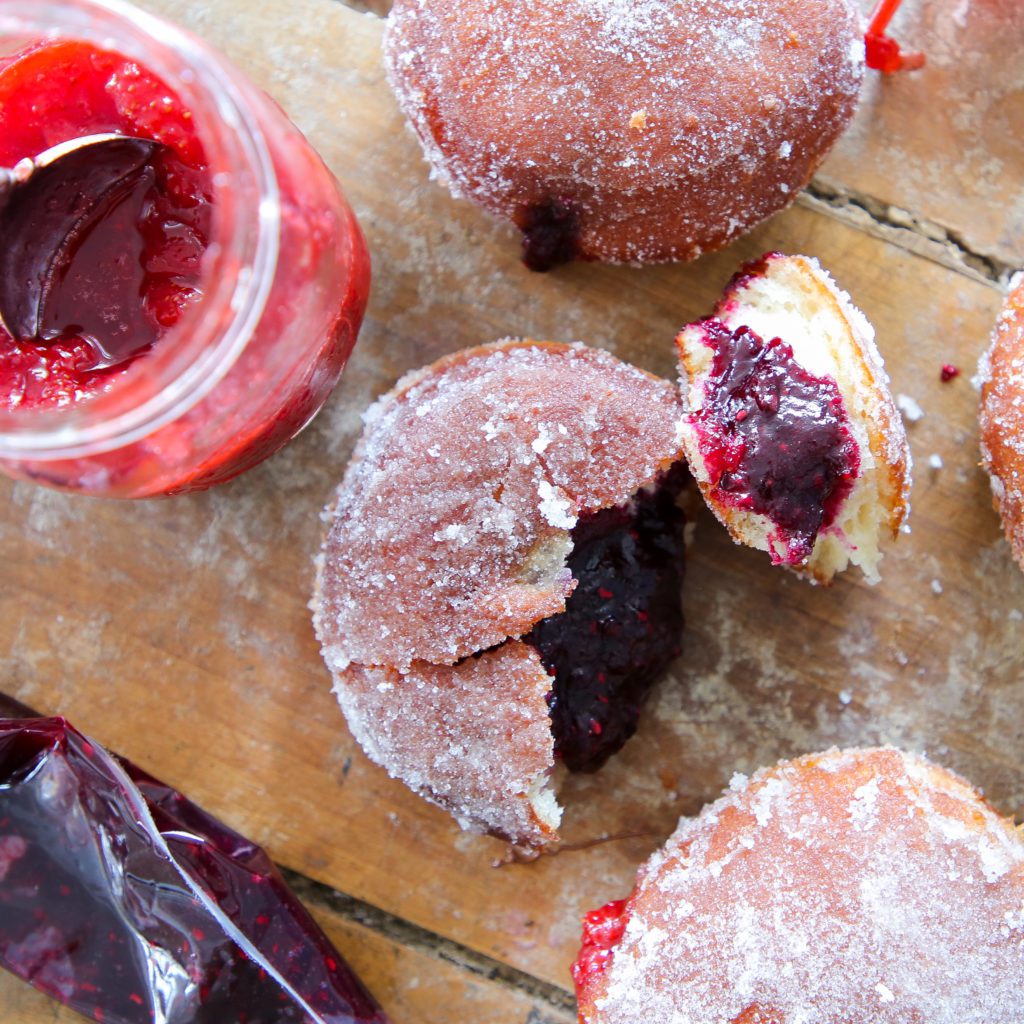
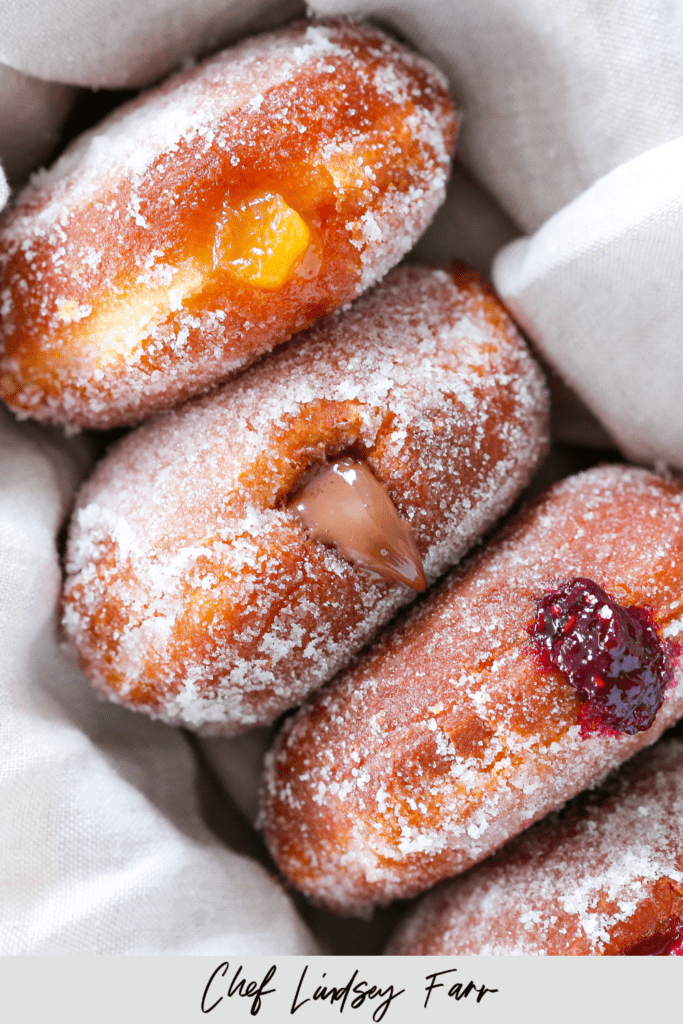
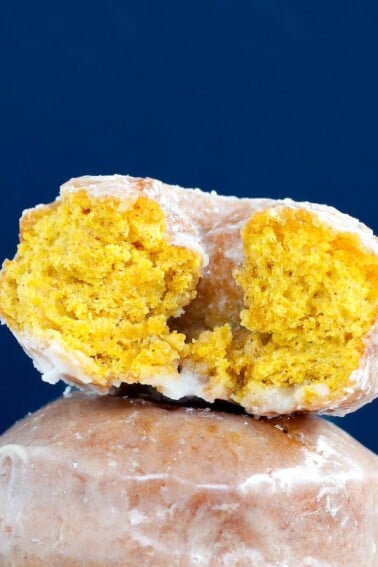
Jelly donuts are traditionally filled with raspberry jam but I am all about breaking traditions around here! Why have one filling when you can have four? I filled these stuffed donuts with this strawberry jam without pectin, peach preserves, Nutella and mixed berry jam.
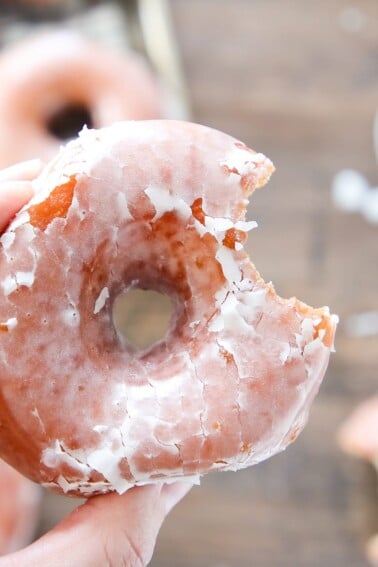
This is my go-to yeasted donut recipe. You can fill it or leave it unfilled, because the donut itself is to die for! It is light and just slightly sweet. I did stick with tradition and toss them in granulated sugar but cinnamon sugar or my classic donut glaze would not be unwelcome!
If today is not the day for you to try yeasted donuts, I understand, and I highly recommend my sour cream donuts instead!
Table of Contents
- Why is this the BEST Jelly Donut Recipe?
- Tips from a Professional Pastry Chef
- Ingredients Needed
- How to Make Jelly Donuts
- Make the dough:
- Proofing the dough:
- Rolling and cutting the dough:
- Frying yeasted donuts:
- How to fill jelly donuts:
- Chef Lindsey’s Recipe Tip
- Video Tutorial
- Variations & Substitutions
- Storage
- Frequently Asked Questions
- Jelly Donut Recipe Recipe
- Before You Go
Why is this the BEST Jelly Donut Recipe?
- Perfect gluten development. Controlling the gluten development is part of what makes this doughnut so light and airy. The first step is using all-purpose flour, which controls how much gluten is available from the get-go. The second step is controlling how much gluten is activated.
- A moist dough makes a light donut. Higher moisture content will add to the light texture of these donuts. It also makes working with the dough more challenging.
- Enrichment: This dough is highly enriched. There is butter, shortening, oil, milk, sugar and eggs in it! All of these additions add flavor and fat. This will add to a soft, moist and tender dough. The fat also hinders gluten development, which makes it harder for the included gluten to form tight strands.

Tips from a Professional Pastry Chef
- Patience really is key. Making the most tender donut requires a bit of patience. Using a light touch rolling out the dough and gently handling will keep the donuts tender. If you see them starting to shrink back at any point, cover them with plastic wrap and let them have a little siesta in the refrigerator. All the resting and chilling really are necessary for the best results!
- Use nonstick cooking spray. As I mentioned above, part of what makes this donut the best is that the dough is a bit sticky. Resist the temptation to add more flour to make the dough more easily workable. Spray your hands and tools with nonstick spray instead!
- Order matters. I spent actual years developing this recipe in the restaurant kitchens where I was the pastry chef. The process for combining the butter, shortening, oil, milk and eggs is all very deliberate. Just have everything ready to go and trust the process!
Ingredients Needed
- All-Purpose Flour: I prefer to use all-purpose flour in the majority of my donut recipes because it has the perfect amount of gluten. This amount of gluten allows the dough to develop a strong network but remain tender and soft. Cake flour will not work, but you can use bread flour.
- Granulated Sugar: Sugar is here for sweetness and a little bit of caramelization.
- Salt: Kosher salt is less salty than table salt and a teaspoon weighs less than other finer ground varieties.
- Butter: Unsalted butter allows you to control the saltiness of the dough while still adding all the buttery goodness!
- Whole Egg: The egg is here to add fat, moisture and inhibit gluten development. The fat from the yolk adds richness and shortens some of the gluten strands to keep the donuts soft and tender.
- Dry Active Yeast: Dry active yeast requires the added step of hydration, but they are fast yet controllable. See substitutions for more options.
- Canola Oil: I use canola oil for frying but another neutral-flavored oil with a high smoke point will do, like crisco shortening.
How to Make Jelly Donuts
Use these instructions to make the perfect jelly donut every time! Further details and measurements can be found in the recipe card below!
Make the dough:
Step 1: The combination method for the wet ingredients in this recipe is very specific and you will want to have everything measured and ready to go.
Step 2: Whisk together flour, sugar and kosher salt in a bowl and set aside. In another small bowl, beat the egg until smooth and no streaks of white remain.
Step 3: In a small pot, melt butter and shortening over low heat. Whisk in oil followed by the milk and finally the beaten egg. Cook over low heat, stirring constantly, until 106°F.
If your butter mixture was too hot when you added the egg and it scrambled, start over. Whisking the egg into the pot in a steady stream will help prevent this but something sh*t happens.
Step 4: Pour into the bowl of a stand mixer and whisk yeast into milk mixture. Set it aside and allow it to bloom for 10 minutes.
Step 5: Fit mixer with paddle attachment and add half the flour to the bowl with the yeast/milk mixture. Mix on low to combine, then add the remaining flour and mix on low until flour is incorporated.
Step 6: Switch to the dough hook and turn speed to medium high and continue to mix until you can see strands pulling from the sides of the bowl into the center when it is mixing, approximately 12 minutes. It will not completely form a smooth dough ball. The hydration is too high for that to happen with all-purpose flour.
Proofing the dough:
Step 7: Spray a large bowl with nonstick cooking spray. Spray hands and bowl scraper with the spray and scrape out the dough into your hands and form into a ball. Place in oiled bowl.
Step 8: Do one fold in the bowl: grab the top far side of the dough with both hands and pull up and then fold over, towards you. Rotate the bowl and then repeat with all four sides.
Step 9: Cover with plastic wrap and bulk proof in the refrigerator for 30 minutes.
Rolling and cutting the dough:
Step 10: Lightly flour your work surface. Using a bowl scraper or silicone spatula, scrape the dough onto the surface. Sprinkle with a bit more flour. Flour your rolling pin. Gently roll out to approximately ½ inch thick.
Step 11: Line a baking sheet with parchment paper and lightly spray with cooking spray. Cut doughnuts with ring molds or biscuit cutters (3”) and place on parchment lined baking sheet. Spray surface of doughnuts, wrap with plastic wrap and refrigerate 2 hours.
Alternatively to cook immediately: instead of chilling doughnuts in the refrigerator a second time, allow to sit out 30 minutes until doubled in size and then fry.
You can re-roll scraps one time with at least 20 minutes of bench rest. Knead the scraps together into a ball, cover with plastic wrap and allow to sit 20 minutes before trying to roll them out again. If they shrink back, give them a little more time to rest! You can also rest them in the refrigerator well wrapped in plastic wrap for up to 24 hours.
Frying yeasted donuts:
Step 12: Pour oil into a fryer or a Dutch oven, making sure the oil is at least 2 inches deep. Heat your oil to 350°F. Adjust your heat to keep the temperature between 350°- 360°F while frying. You will need a clip-on fry/candy thermometer for this. I heat my oil up to 360°F before adding a batch of donuts, because the cold dough will lower the temperature of the fryer oil.
Step 13: Allow the donuts to sit at room temperature 6 minutes prior to frying.
Gently place 3-5 donuts in the fryer, while keeping the remaining donuts in the fridge. The number you can fry at once depends on the size of your pot. You want the donuts to have room to move around and space to puff.
Once they rise to the surface, cook for 60 seconds and then flip them with a slotted spoon. Fry until the bottom develops a nice golden brown color, about 45 seconds. Flip it again and then fry for another 10-30 seconds or until the color is a nice even golden brown. I usually test mine with a cake tester. Pull the donut out of the oil with a spider or slotted spoon, poke it and then pull the cake tester out. It should not have any streaks of dough or crumbs.
Step 14: Transfer to a wire rack set over a sheet pan or paper towels.
The fry time is not only dependent on oil temperature but also the temperature of the dough and how well proofed it is. The easiest thing to do is to check it intermittently with a cake tester. If it comes out clean through the center, its done!
Step 15: Allow oil to drip off doughnut 10 seconds then roll in granulated sugar or dip in glaze.
How to fill jelly donuts:
Step 1: Place desired fillings in a piping bag or a zip-top bag.
Step 2: Cut off the corner of the bag or the tip just large enough for the filling to come out. There is no need for you to use a pastry tip. I find they only add to the drama.
Step 3: Poke a hole in the donut with a chopstick, skewer or paring knife. Insert the bag into the hole and squeeze!
I like to fill my donuts until the filling flows a little out of the hole once you stop. You could always test one to see if there is enough filling…it’s a tough job but someone has to do it!
Chef Lindsey’s Recipe Tip
My best professional advice is to let the dough guide you. If it shrinks when rolling or cutting, put it back in the refrigerator to chill and relax. If it isn’t light and airy when the timer says it “should” be, then give it the time it needs or proof it in a warmer environment. Watch the dough, listen and adjust.
Video Tutorial
Variations & Substitutions
- Yeast Substitution: If you don’t have dry active yeast, you can substitute double the weight of fresh yeast or half the weight in instant yeast. If using either fresh or instant yeast, add them to the dry ingredients. Do not continue heating the mix mixture after incorporating. A kickstart to the fermentation process would be unwelcome in this instance.
- Flour Substitution: All-purpose has the perfect amount of gluten for yeasted donuts. This amount of gluten allows the dough to develop a strong network but remain tender and soft. Cake flour will not work, but you can substitute bread flour. Pastry flour is also not advisable.
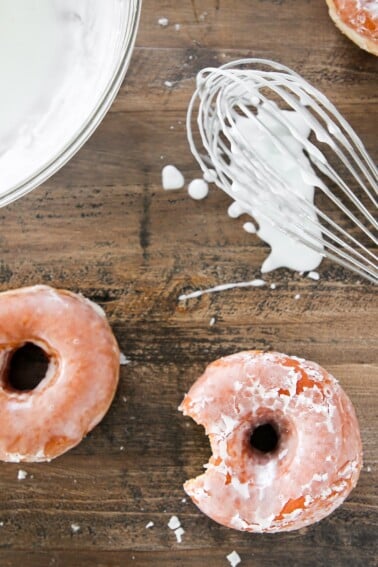
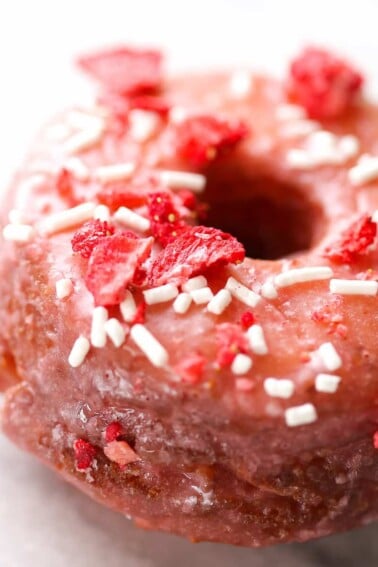
- Glazed Filled Donuts: I toss them in granulated sugar before filling with jam or preserves but they are also delicious when dipped in this easy donut glaze recipe.
- Jam Flavors: If my photos are any indication, you can use whatever jam, jelly or preserves you choose for this jelly donut recipe! A thicker jam will be better but the preserves were looser and still turned out great.
Storage
Filled donuts are best the day they are made and should be stored at room temperature uncovered. When stored in an airtight container they begin to taste a bit like oil. If storing longer than a day, store in a container with the corner slightly cracked as a vent for up to three days. They will slowly begin to dry out but they will still taste delicious! I do not recommend refrigerating or freezing fried donuts.
The cut, raw dough can be stored in the freezer for a week. The exact length of time will depend on your particular freezer and how proofed the donuts were when frozen. The freezer will retard (slow) the proofing process but it will not stop it. When they feel light and airy, they are fully proofed and can be fried straight from frozen. Allowing them to proof additional time at room temperature could lead to over proofed and flat donuts.

Frequently Asked Questions
Yes! Roll out and cut the dough as directed. You can then cut a hole in the center of each donut for a more traditional glazed donut shape. Dip my classic donut glaze while still warm! Fun fact: you can still fill them. Just fill in several places around the edges! It will ooze out but no one will care.
You can make the dough ahead, but it is a yeasted dough and will continue to proof. This isn’t a cause for concern but it does limit your advanced prep timeline. I suggest preparing them no more than three days in advance when refrigerating and no more than a week in advance if freezing. Alternatively, you could reduce the yeast by half and they will proof slower and will give you more time.
I have tested this jelly donut recipe in a professional bakery setting. You are only limited by the capacity of your particular mixer. I would strongly suggest measuring by weight when multiplying this recipe. Doughnut doughs are particularly sensitive to minute adjustments of flour and hydration. I scale all my recipes, but it is particularly important when making a larger batch.
If the dough rose before frying, then most likely the dough was over proofed prior to hitting the oil. The dough, even when cold, should feel light and airy. It should give when touched but retain its shape. If the dough did not rise prior to frying, then the yeast was most likely dead or old.
Jelly Donut Recipe
Ingredients
- 30 g unsalted butter 2 T
- 25 g shortening 2 T
- 28 g vegetable oil 2 T + ½ t
- 315 g whole milk 1 cup + 3 T + 1t
- 1 large egg beaten
- 14 g dry active yeast 1 ½ T
- 470 g all purpose flour 3 ¾ cup
- 100 g granulated sugar ⅓ cup + 1 ½ T
- ¾ tsp kosher salt
- 1 cup granulated sugar for coating
- 1 ½ cup jam or jelly Nutella, jams, or jellies. This allows for a generous stuffing!
Instructions
Prepare the dough:
- Whisk together flour, sugar and kosher salt in a bowl and set aside. In another small bowl, beat the egg until smooth and no streaks of white remain.
- In a small pot, melt butter and shortening over low heat.Whisk in oil followed by the milk and finally the beaten egg. Cook over low heat, stirring constantly, until 106°F.
- Pour milk mixture into the bowl of a stand mixer and whisk in yeast. Set aside for 10 minutes.
- Fit mixer with paddle attachment and add half the flour to the bowl with the yeast/milk mixture. Mix on low to combine, then add the remaining flour and mix on low until flour is incorporated.
- Switch to the dough hook and turn speed to medium high and continue to mix until you can see strands pulling from the sides of the bowl into the center when it is mixing, approximately 12 minutes. It will not completely form a smooth dough ball.
Proofing the dough
- Spray a large bowl with nonstick cooking spray. Spray hands and bowl scraper with the spray and scrape out the dough into your hands and form into a ball. Place in oiled bowl.
- Do one fold in the bowl: grab the top far side of the dough with both hands and pull up and then fold over, towards you. Rotate the bowl and then repeat with all four sides.
- Cover with plastic wrap and bulk proof in the refrigerator for 30 minutes.
Rolling and cutting the dough
- Lightly flour your work surface. Using a bowl scraper or silicone spatula, scrape the dough onto the surface. Sprinkle with a bit more flour. Flour your rolling pin. Gently roll out to approximately ½ inch thick.
- Line a baking sheet with parchment paper and lightly spray with cooking spray. Cut doughnuts with ring molds or biscuit cutters (3”) and place on parchment lined baking sheet. Spray surface of doughnuts, wrap with plastic wrap and refrigerate 2 hours.
- Can re-roll scraps one time with at least 20 minutes of bench rest. Knead the scraps together into a ball, cover with plastic wrap and allow to sit 20 minutes before trying to roll them out again. If they shrink back, give them a little more time to rest!
- Alternatively to cook immediately: instead of retarding doughnuts in the refrigerator a second time, allow to sit out 30 minutes until doubled in size and then fry.
Frying the donuts
- Pour oil into a fryer or a Dutch oven, making sure the oil is at least 2 inches deep. Heat your oil to 350°F. Adjust your heat to keep the temperature between 350°- 360°F while frying. You will need a clip-on fry/candy thermometer for this. I heat my oil up to 360°F before adding a batch of donuts, because the cold dough will lower the temperature of the fryer oil.
- Allow the donuts to sit at room temperature 6minutes prior to frying. Gently place 3-5 donuts in the fryer, while keeping the remaining donuts in the fridge. The number you can fry at once depends on the size of your pot. You want the donuts to have room to move around and space to puff.
- Once they rise to the surface, cook for 60 seconds and then flip them with a slotted spoon. Fry until the bottom develops a nice golden brown color, about 45 seconds. Flip it again and then fry for another 10-30 seconds or until the color is a nice even golden brown. I usually test mine with a cake tester. Pull the donut out of the oil with a spider or slotted spoon, poke it and then pull the cake tester out. It should not have any streaks of dough or crumbs.
- Transfer to a wire rack set over a sheet pan or paper towels.The fry time is not only dependent on oil temperature but also the temperature of the dough and how well proofed.
- Allow oil to drip off doughnut 10 seconds then roll in granulated sugar or dip in glaze.
How to fill jelly donuts
- Place desired fillings in a piping bag or a zip-top bag.
- Cut off the corner of the bag or the tip just large enough for the filling to come out. There is no need for you to use a pastry tip. I find they only add to the drama.
- Poke a hole in the donut with a chopstick, skewer or paring knife. Insert the bag into the hole and squeeze! I like to fill my donuts until the filling flows a little out of the hole once you stop. You could always test one to see if there is enough filling…it’s a tough job but someone has to do it!
Video
Notes
Nutrition
Before You Go
I hope you enjoyed this professional chef tested recipe. Check out our other delicious, chef-developed donut recipes!


Hi
I need the donuts for tomorrow evening and want to fry them in the morning. Can I refrigerate the raw donuts in the fridge overnight. And do I let them get to room temperature before frying.
thank you
by the way..I’ve made them in the past and they are delicious!
Hi Maryanne!
You can make the dough ahead, but it is a yeasted dough and will continue to proof. This isn’t a cause for concern but it does limit your advanced prep timeline. I suggest preparing them no more than three days in advance when refrigerating and no more than a week in advance if freezing. Alternatively, you could reduce the yeast by half and they will proof slower and will give you more time.
The cut, raw dough can be stored in the freezer for a week. The exact length of time will depend on your particular freezer and how proofed the donuts were when frozen. The freezer will retard (slow) the proofing process but it will not stop it. When they feel light and airy, they are fully proofed and can be fried straight from frozen. Allowing them to proof additional time at room temperature could lead to over proofed and flat donuts.
Can’t wait for you to enjoy them again! Happy frying! 🙂
Hello, I haven’t tried the recipe yet but what could I substitute the shortening for?
Butter 🙂 Get it!
Hi Erin! I’ve made a couple others of your donut recipes and I can’t say how much I appreciate your attention to detail with so many thorough tips to make professional quality donuts at home.
I see you indicate that you can use any filling in these donuts, and that this dough could also be used to make classic glazed donuts. If I used a pastry cream and topped with a chocolate glaze, I know it would technically work as a Boston cream donut …. My question is, would you recommend that, or is there a different dough that would be better for Boston cream?
Hi Amanda, I have used this dough to make Boston Cream donuts in the restaurant, so, yes, I would recommend that! You can also use the dough from my Krispy Kreme donuts, which make super light donuts. Though that dough is more challenging to work with.
Hi. I am making the recipe today. You don’t mention adding the shortening anywhere and in the instructions mention adding eggS ( more than the 1 in ingredients?) and vanilla (not listed in ingredients). Please clarify.
Looking forward to making these !
Hi Liz! I could see why that would be confusing! I put eggs as plural in the instructions because I always weigh my eggs to get super precise in my kitchen, but 1 Large Egg will do you, so I’ve updated the instructions to be singular. I also added when to include the shortening (when you melt the butter), which was another excellent catch. I can’t wait for you to make these, please come back and let me know how they turn out! ?
these look amazing! Can they be cooked in the airfryer or baked? Hate dealing with hot oil?
Sadly, they won’t be the best version of themselves. You can try the airfryer after they have fully proofed. I would lightly spray both the basket and the donut with cooking spray so that they don’t stick and it gives the sugar something to stick to once cooked. Let me know how it goes!